

Planning Double Girder Overhead Crane Placement During Steel Structure Factory Design
The design of a steel structure factory is a complex process that requires careful consideration of material flow, workflow efficiency, structural integrity, and safety. Among the most critical elements in such a facility is the placement of overhead cranes, especially double girder overhead cranes, which are widely used for lifting heavy materials, steel beams, and machinery components. Proper planning of crane placement not only ensures operational efficiency but also maximizes factory space utilization, improves safety, and minimizes long-term operational costs.
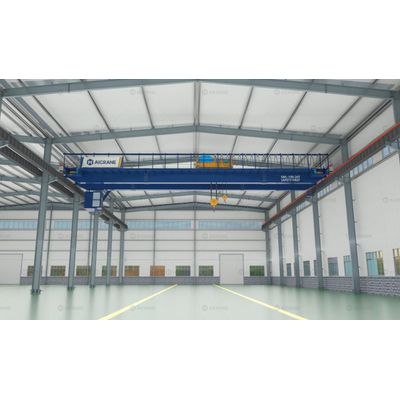
Understanding the Role of Double Girder Overhead Cranes
Double girder overhead cranes consist of two parallel bridge girders that run on rails mounted on the factory’s sidewalls. These cranes are preferred for heavy-duty lifting because they can handle large capacities, typically ranging from 10 tons to over 500 tons, depending on design requirements. Unlike single girder cranes, double girder cranes allow for longer spans, higher lifting heights, and the use of heavier hoists or specialized lifting attachments, making them ideal for steel factories where large and heavy materials are handled.
In a steel structure factory, double girder overhead cranes are often used for:
- Steel Plate Handling: Moving large steel sheets between cutting, rolling, and storage areas.
- Beam Lifting: Transferring fabricated beams from production lines to storage or assembly zones.
- Heavy Machinery Installation: Installing or relocating presses, rollers, and other industrial machines.
- Material Loading and Unloading: Assisting in logistics operations by moving raw materials and finished products.
Given these applications, careful planning during the factory design phase is essential to optimize crane performance.
Key Factors in Crane Placement Planning
Planning the placement of double girder overhead cranes requires a holistic approach, considering both technical specifications and operational workflow. The main factors include:
1. Load Capacity and Crane Type
The first step is defining the crane’s lifting capacity, span, and height. The capacity dictates the structural strength requirements of the supporting steel framework and the size of the bridge girders. The span—the distance between the runway rails—affects the factory layout, as a wider span allows for greater coverage but increases structural demands.
The type of crane also matters: whether it is top-running or underhung. Top-running cranes have the trolley and hoist running on girders supported by the runway beams, allowing higher lifting capacities. Underhung cranes are suspended from the building’s roof structure and are suitable for lighter loads and restricted headroom.
2. Workflow Analysis and Material Flow
Efficient crane placement begins with mapping out material flow within the steel factory structure. Planners must consider:
- Entry points for raw materials
- Production areas for steel processing
- Assembly or fabrication zones
- Storage areas for semi-finished and finished goods
- Loading docks for outbound shipments
By analyzing this flow, cranes can be positioned to minimize unnecessary material handling and travel distance, which improves production efficiency and reduces wear and tear on the crane system.
3. Structural Considerations
Double girder overhead cranes exert significant loads on supporting structures. The factory’s steel frame and columns must be designed to support both static and dynamic loads from crane operations. Factors include:
- Maximum lifting load
- Crane self-weight
- Dynamic effects during acceleration, deceleration, and load swinging
- Localized stress at crane runway supports
Early integration of crane load calculations into structural design avoids costly modifications later and ensures safety compliance with international standards such as FEM or CMAA.
4. Headroom and Lifting Height
The lifting height is the vertical distance from the factory floor to the hoist hook at the topmost position. Designers must ensure adequate headroom to prevent interference with building components, including trusses, ventilation ducts, lighting fixtures, and overhead piping.
The lifting height also influences crane selection: higher lifting requirements may necessitate a double girder design to accommodate taller hooks and heavy-duty hoists.
5. Span and Number of Cranes
Determining the number of cranes and their spans is critical. Some factories operate multiple cranes in parallel to handle large loads or improve workflow flexibility. When multiple cranes share the same runway, careful attention must be paid to spacing and synchronized operations to prevent collisions and maximize coverage.
Span planning also involves trade-offs: a longer span reduces the need for multiple cranes but increases building column spacing and structural demands. Shorter spans reduce structural load but may require additional cranes to cover the entire production area.
6. Safety and Accessibility
Safety is a primary concern in crane placement. Key considerations include:
- Avoiding interference with pedestrian traffic and other machinery
- Ensuring sufficient clearance for emergency evacuation routes
- Providing access for maintenance of cranes, hoists, and supporting rails
- Implementing anti-collision and overload protection systems
Accessibility also includes positioning crane controls—either pendant, ground, or cabin controls—in locations that maximize visibility while minimizing operational hazards.
7. Flexibility for Future Expansion
A steel structure factory may evolve over time, with changing production lines or increased load requirements. When planning crane placement, designers should anticipate future needs, such as:
- Upgrading to higher capacity cranes
- Adding additional cranes for new production areas
- Expanding storage zones or material handling routes
Building in flexibility during the initial design prevents costly retrofits and downtime in the future.
Integration with Factory Layout
The integration of crane placement with overall factory layout is essential for maximizing operational efficiency. Some best practices include:
- Centralized Crane Aisles: Placing cranes along central aisles allows them to cover multiple workstations and storage areas efficiently.
- Zoning Based on Load Type: Heavy-duty cranes for large steel beams can be separated from lighter cranes used for assembly or secondary operations.
- Minimizing Obstructions: Ensuring cranes have unobstructed paths, avoiding fixed machinery or storage racks that could hinder movement.
- Optimizing Loading and Unloading Areas: Positioning cranes near material entry and exit points reduces transportation time and energy consumption.
By coordinating crane placement with workflow and production zoning, factories can achieve smooth operations, reduce bottlenecks, and optimize labor efficiency.
Practical Considerations in Crane Planning
While theoretical planning is crucial, practical constraints often influence crane placement decisions. These include:
- Budgetary Limits: High-capacity cranes and long-span bridges increase construction and equipment costs. Designers must balance operational requirements with financial feasibility.
- Building Height Restrictions: Local regulations or structural limitations may constrain crane height and lifting clearance.
- Maintenance Accessibility: Adequate space must be left around crane rails and machinery to allow inspection, lubrication, and repairs without halting production.
- Integration with Other Equipment: Cranes must coexist with forklifts, conveyors, welding stations, and other factory equipment without causing interference.
Considering these factors ensures that crane placement is both operationally effective and practically achievable.
Case Study: Effective Crane Placement in a Steel Fabrication Facility
In a modern steel fabrication factory producing structural beams, double girder overhead cranes were planned with a focus on efficiency and safety. The facility included:
- Two 50-ton cranes covering the main assembly area
- A 20-ton crane for handling lighter components in the secondary fabrication zone
- Crane spans ranging from 18 to 30 meters, designed to cover multiple workstations without requiring excessive movement
- Strategic placement near raw material storage, cutting, and welding stations to minimize travel distances
- Consideration of future expansion, allowing an additional 50-ton crane to be added as production increased
The result was a facility where cranes operated smoothly without conflicts, improved material handling efficiency by 25%, and minimized structural stress on columns and beams.
Conclusion
The placement of double girder overhead cranes in steel structure factory design is a critical factor influencing operational efficiency, safety, and long-term flexibility. It requires careful consideration of load capacity, material flow, structural support, headroom, crane spans, safety, and future expansion. Integrating crane planning into the early stages of factory design ensures that the cranes can operate efficiently, safely, and in harmony with other production systems.
By approaching crane placement as a strategic component of factory layout rather than an afterthought, manufacturers can maximize the benefits of their investment in heavy lifting equipment and create a production environment that supports growth, adaptability, and high operational efficiency.