
Ogawa & Company, USA, Inc.
- Home
- Companies & Suppliers
- Ogawa & Company, USA, Inc.
- Downloads
- Protocol for Ozone Measurement (PDF 97 ...
Protocol for Ozone Measurement (PDF 97 KB)
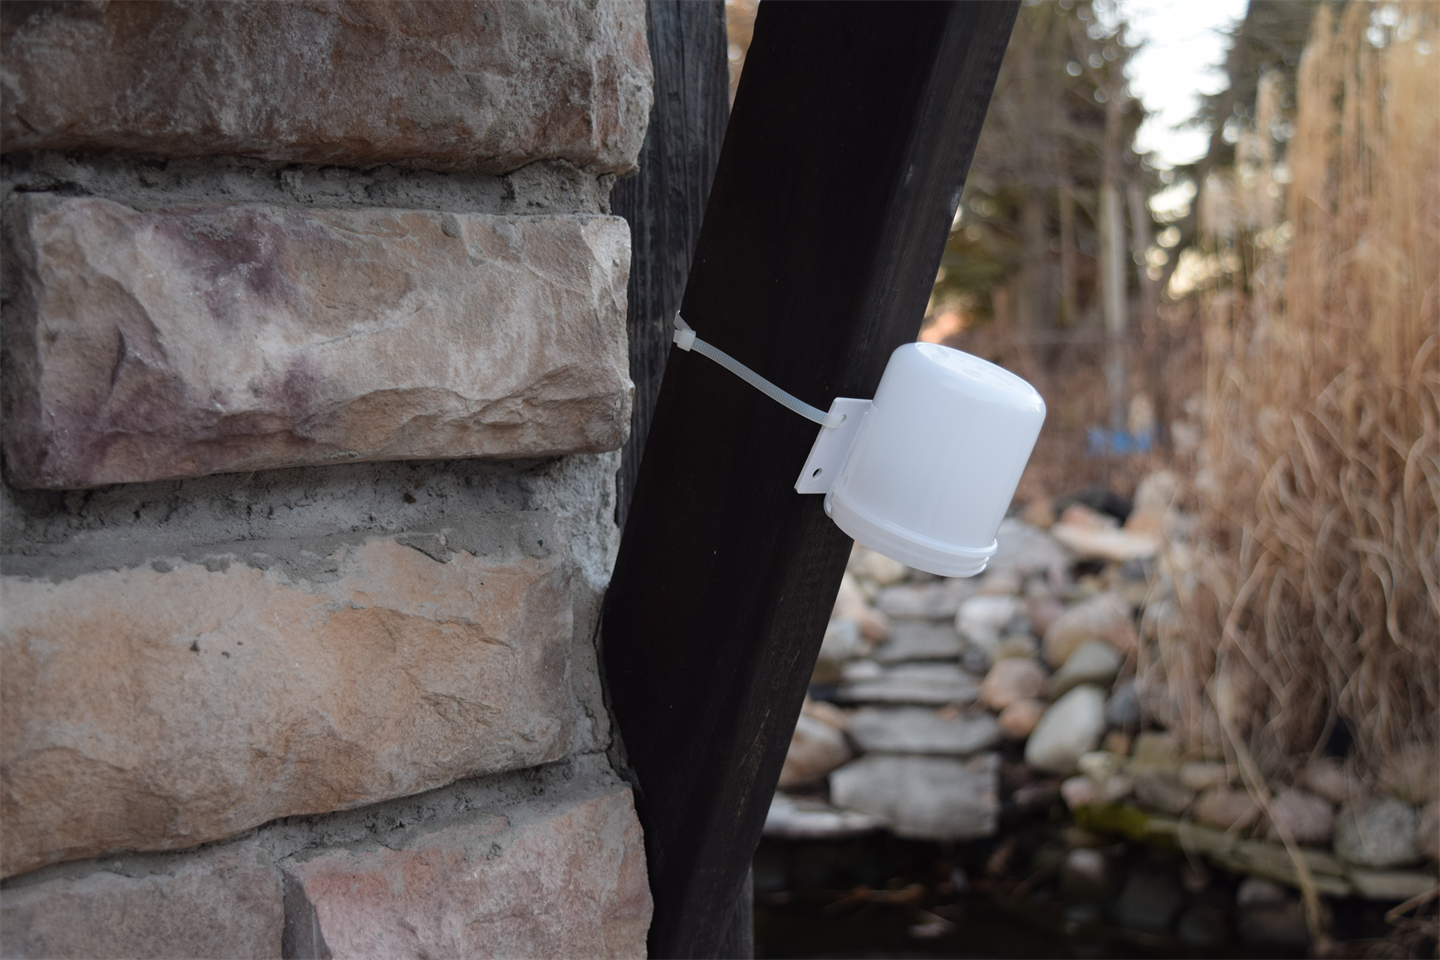
1 PROTOCOL FOR OZONE MEASUREMENTUSING THE OZONE PASSIVE SAMPLER BADGE REVISION 3: FEBRUARY, 2001 OUTLINE I. Introduction II. Preparation of the Sampler Using Pre-coated Filters III. Sample Collection IV. Disassembly of the Sampler After Exposure V. Laboratory Analysis of Passive Ozone Samples VI. List of Appendices Harvard School of Public Health Environmental Science and Engineering Program Department of Environmental Health 665 Huntington Avenue Boston, MA 02115 USA Modified by Ogawa & Co., USA, Inc. January-2001 2 I. Introduction The ozone passive sampler badge uses the passive monitor device which that was developed by Ogawa & Co. for collecting nitrogen oxides (NOx). The ozone badge uses a coated filter, which traps ozone, while the NOx badge uses other filters to trap nitrogen oxides. The filter for ozone is coated with a nitrite-based solution. Ozone oxidizes the nitrite to nitrate. After exposure, the filter is extracted with ultra-pure (Milli-Q) water and the filter extract is analyzed by ion chromatography (IC) to determine the nitrate ion concentration, which is used to calculate the total amount of ozone collected. An ozone-free glove box is recommended to protect the coated filters from exposure to ozone present in the laboratory air, if the laboratory is using air conditioning which brings in outside air. Generally, re-circulating air-conditioning is clean enough to make using the glove-box not necessary, unless sources of Ozone are known to be present. Note that this protocol assumes that pre-coated filters, available from Ogawa & Co., USA, will be used. If further information is needed, please contact Ogawa and Co. USA, Inc., www.ogawausa.com Study Design Considerations Nitrite on coated filters is slowly converted to nitrate even without exposure to ozone, and this conversion is more rapid at warmer temperature. As long as the blank samplers are kept, as much as possible, at the same temperature as the field samplers, adequate compensation is made by subtracting the average amount of nitrate on the blanks from each sample. When there is a longer time delay and/or higher storage temperatures between the preparation and analysis of the samplers, the blank values will be generally larger, and the associated uncertainty will also be larger. A batch of samplers consists of a group of field blanks and field samples, which share the same coating date, the same preparation date, the same handling, and preferably, the same IC analysis date. Since unexposed filters are stored refrigerated before being loaded into samplers, all filters used for a designated batch must be removed from the refrigerated vial at the same time. Samplers from the same batch are assembled, exposed, and disassembled over some period of time defined by the field study, but for the best results, the time period should not exceed four weeks. As much as is possible, keep all the blanks and samples at the same temperature. This can be done if the blanks and samples are kept together except when the samplers are actively collecting ozone. Also, if it is necessary to disassemble some of the blanks and samples from a batch before the others, best results will be obtained if the remaining (assembled) monitors are kept together with the extract vials containing the filters from the disassembled monitors. Keep all vials and monitors in a cool place, (refrigerated but not in freezer), until they are ready to prepare for IC analysis. This will minimize variation in the differences due to temperature effects within the batch. OZONE PASSIVE SAMPLER PROTOCOL, REVISION 2, 2/7/94 3 At least 10% of the samplers from each batch must be used as field blanks. More may be necessary if all the blanks and samples are not analyzed by IC on the same day. When a batch of samples is divided into groups to be analyzed on different days, enough field blanks must be initially included to allow for three blanks for each group of field samples. Field blanks are transported along with samples to the field site. To handle each blank similarly to the samples, it is removed from the storage bottle and the re-sealable bag, and then immediately placed back in the bag and in the bottle. For outdoors, rain/wind covers (discussed later) are necessary to keep samplers dry during exposure, to prevent possible oxidation of un-reacted nitrite ions. Milli-Q water (or equivalent) is necessary for extracting filters; however, distilled or distilled de-ionized water is adequate for washing and cleaning sampler parts and forceps. When samplers must be transported (back to a central lab) from distant locations after exposure in the field, insulated shipping boxes may be used to reduce exposure to higher temperatures during shipment. Do not refrigerate exposed samplers during shipping (or at anytime prior to preparation for I.C. analysis) because humidity within the re-sealable bag may condense and wet the filter. Place the samplers inside plastic bags within the insulated box. A group of samples (with blanks) which are intended to be analyzed together must also be shipped together, by the fastest shipping available. H. Preparation of the Sampler Using Pre-coated Filters Equipment and Supplies: Components for each ozone badge: 1 sampler body (with 2 spacer disks & 2 rings) 2 diffusion end-caps (1 per end) 4 stainless steel screens (2 screens per end) 1 pin-clip holder 1 storage bottle (amber polystyrene) 1 re-sealable plastic bag tape to seal storage bottles Other items ID (identification) labels (2 per sample) pre-coated filters for ozone (2 per sample) 1 forceps, blunt for filter handling 1 forceps, sharp with curved tip 1 glove-box (if required) OZONE PASSIVE SAMPLER PROTOCOL, REVISION 2, 2/7/94 4 filter paper sheets for glove-box floor, 18” x 24” reagent grade sodium nitrite ethanol lint-free paper wipes (Kimwipes or equivalent), large & small 1 plastic squeeze bottle with Milli-Q water 1 plastic squeeze bottle for paper sheet coating solution Pre-coated Filters for Ozone Measurement Pre-coated filters are supplied by Ogawa & Co., USA, Inc.(www.ogawausa.com) in vials labeled with the date of coating. Keep a laboratory record of the date of filter coating and the date of assembly for each batch of samples and blanks. The pre-coated filters must be stored in their original containers in a cool, dark place, preferably at 50C. As a coated filter ages, a slow conversion of nitrite to nitrate occurs. For best results allow no more than four weeks from the coating date to the analysis date. Assembly of the Ozone Passive Sampler A. Ozone sampler parts. Clean all components following the instructions in Appendix A. Place an ID label on the back of each pin-clip. Place the following inside the glove-box: containers with clean screens, clean cylindrical bodies, and clean diffusion end-caps; also pin-clips, resealable bags, and protective amber bottles; as well as a sealed vial of pre-coated filters. B. Sampler assembly. A diagram of the sampler components is shown in Figure 1. Use the blunt forceps whenever possible to prevent filter damage. Note that two filters must be placed into each sampler, one at either end of the sampler body. All components must remain completely dry during the assembly. This requires that after forceps are wiped clean with a moist Kimwipe, they must be completely dried before handling the filters and screens. Use the blunt forceps whenever possible to prevent filter damage. Use the following assembly steps for each sampler: OZONE PASSIVE SAMPLER PROTOCOL, REVISION 2, 2/7/94 51. In the glove-box place a cylindrical sampler body upright on a clean Kimwipe, or alternatively hold it between 2 fingers. Avoid touching the inside of the ends of the body with fingers. 2. Using the forceps, place one stainless screen in one end of the cylinder. Be careful not to bend or damage the screen, and make sure that it sits flat on the Teflon spacer ring inside the cylinder end. 3. Open the vial containing the pre-coated filters. Use forceps to gently grip one of the filters by its edge. Place the filter in the end of the cylinder. Again, be careful not to damage the filter and watch that it sits flat on the stainless screen. If a filter is dropped, discard it and get another from the glass vial. Be careful not to contaminate the unused filters. 4. Place a second stainless screen over the pre-coated filter, taking the same precautions as before. 5. Pick up a diffusion end-cap by its edge. Avoid touching its flat sides. Securely place an end-cap into the end of the body. If the end-cap is slightly loose, the retaining ridge on the pin-clip will hold it in place. 6. Next, turn the body of the badge over and repeat directions 2 through 5 to insert a screen, a coated filter, another screen, and the end-cap into the opposite end of the cylinder. 7. Snap the assembled body into a pin-clip holder (which was had the ID label attached before placing in the glove box), without touching the flat surface of the end-caps. 8. Place the completed badge into a re-sealable bag. Expel the air from the bag and seal it. 9. Place the sealed bag inside the airtight brown vial and firmly seat cap on vial. After all the samplers have been prepared, remove the brown vials from the glove-box. 10. Place the matching ID label on the outside of the storage bottle. 12. Make sure that the ID label on the bottle is the same as on the badge inside the bottle. III. Sample Collection Sampling Locations A. Outdoor locations: For outdoor sampling locations, there are three main considerations. First, the samplers must be located away from very local sources of nitrogen oxides (such as trucks, buses, automobiles, or other internal combustion engines), which will decrease the ozone concentration below the ambient concentration for the general sampling area. Second, samplers must also be located far enough away from walls or other surfaces that will deplete the ozone concentration in the vicinity of the sampler below the ambient concentration in the general area. Generally a distance of 20 cm or more from vertical surfaces and 1.5-2 m above the ground are adequate distances for this purpose. Third, the sampler must be located inside a protective cover (see discussion on page 8.) which prevents contact with rain and which also acts as a wind barrier, to stabilize the sampler collection rate. OZONE PASSIVE SAMPLER PROTOCOL, REVISION 2, 2/7/94 6B. Indoor locations For indoor sampling inadequate air movement can cause a decrease in the sampler collection rate. To prevent this, a minimum amount of ventilation is necessary in the indoor location used for sampling. In addition, indoor sources of interfering nitrogen oxides can have the same effect as outdoor sources. Therefore, the sampling badge must not be located behind furniture, near gas stoves, near the door to the garage, or near sources of water, such as in the bathroom or near the kitchen sink. Place the sampler 1.5 to 2 m above the floor and at least 30 cm away from any wall. It may be easiest to choose a location near the center of the room and suspend the sampler from the ceiling or other fixture. Current studies by HSPH place the indoor samplers upwind from a small fan in a sampling rack (see Figure 3.). This insures a sample with a constant wind speed, minimizing starvation effects or restricted air-flow in indoor settings. Finally, avoid placing the sampler in the air-stream from ventilation inlets or outlets. The location selected must be easily accessible, rugged, and useable for subsequent occasions. Include notes in the field data log regarding the location of the sampler, types of indoor surfaces (e.g. carpet, wood paneling), building ventilation (e.g. central air conditioning, roof exhaust fan) and building construction. Sampling Start-up: 1. Field blanks are transported along with samples to the field site. To handle each blank similarly to the samples, it is removed from the storage bottle and the resealable bag, and then immediately resealed in the bag and placed in the bottle. 2. Prior to opening the brown storage vial containing the ozone sampler, make notes in the field data log concerning sampler placement, weather, etc., then enter the start date and time. 3. Open the container and remove the sampling badge from the resealable bag. 4. Check that the ID label on the bottle is the same as on the badge. If they are not the same, enter the ID of the badge on the field data log with a pen. If they are the same, remove the ID label from the outside of the brown storage bottle and place it in the proper location on the field data log. 5. Secure the sampler in the desired location. If outdoors, it must be inside the protective weather Shelter. See the description of the cover below. 6. Replace the re-sealable bag in the brown storage bottle and tighten cap securely . OZONE PASSIVE SAMPLER PROTOCOL, REVISION 2, 2/7/94 7To End Sampling 1. Remove the badge from the sampling location and place it in the resealable bag, then in the storage bottle, securing the screw-on cap. Be sure to leave the ID label on the sampler, and verify again that it is the same as the ID on the field data log. 2. Make a note of the sampling end date and time in the field data log. 3. Make notes regarding the weather, unusual circumstances, or appearance of the sampler. Outdoor Weather Shelters for Ozone Samplers The purpose of the outdoor rain/wind shelter is to minimize the potential for rainwater to enter the sampler and destroy the integrity of the coated filter which collects ozone gas. In addition, the goal is to minimize the loss of ozone on surfaces of the cover, which would cause an underestimation of the concentration in ambient air. Lastly the dimensions must be appropriate to prevent the starvation” effect, whereby the air in the immediate vicinity of the sampler becomes depleted of ozone enough to reduce significantly the collection rate, which would also cause an underestimation of the ambient concentration. The weather cover consists of a pvc (polyvinyl chloride) body with a flexible plastic badge support clip. A metal hose-clamp, which is provided with the shelter, is used to attach the weather cover to a support system which holds it away from a wall or pole. The badge support clip holds the bottom of the cylinder of the badge 1.3 cm (0.5 inches) above the bottom of the weather cover, to minimize ozone losses on the other surfaces of the sampler. Before attaching the weather cover to the support arm, remove the badge support clip. After the cover is attached to the support arm, attach the pin-clip of the sampler badge to the badge support clip, as shown in Figure 4. Then attach the badge support clip to the rain/wind cover. IV. Disassembly of the Sampler After Exposure A. EQUIPMENT After sampling, the badges will be disassembled and filters removed in the laboratory.. The following supplies are needed for this process: clean, dry extract vials with caps beakers for used sampler components glass Petri dish small and large Kimwipes squeeze-bottle with Milli-Q water forceps, blunt for filter handling forceps, unserrated, sharp with curved tip OZONE PASSIVE SAMPLER PROTOCOL, REVISION 2, 2/7/94 8B. EXTRACT VIAL PREPARATION. Extract vials and caps must be thoroughly rinsed at least 3 times with Milli-Q water. Shake excess water from the vials and screw-caps. Lay on large Kimwipes to dry. Cover with a single layer of Kimwipes to protect from dirt and dust. When completely dry, screw the cap onto the vial to keep the interior clean. C. SAMPLER PREPARATION. Place a group of not more than 10 samplers at the rear of the glove box. Do not open the bottles in the room. D. SAMPLER DISASSEMBLY. To prevent mislabeling of the extract vials, process only one sampler at a time. Proceed as follows: 1. Remove the sampler from the protective bottle and from its re-sealable bag. Remove the sampler body from the pin-clip. 2. Select a clean extract vial. Remove the label from the pin-clip and transfer it to the extract vial. 3. Remove the cap from the extract vial. 4. Hold the sampler body over the clean Petri dish. Hold the sampler body using fingers, with one end pointing up. Remove the top end-cap of the sampler body (use clean flat forceps as a wedge, if necessary) and place the end-cap in the beaker for used end-caps. 5. Still holding the body above the Petri dish, tilt it to allow the filter and the two stainless steel screens to fall onto the dish. Use forceps, if necessary, to get the filter and screens out of the body, being careful not to damage the screens. 6. Separate the filter from the screens using the different clean forceps. 7. Place the filter into the extract vial, if the filter does not insert easily, fold the filter using the two forceps together. 8. Remove the filter from the other end of the body using the same techniques as above, and place it in the same vial as the first filter. Then cap the extract vial securely. 9. After finishing transfer of both filters to the extract vial, clean the forceps (both), the razor blade, and the Petri dish with moist Kimwipes, making sure that they are all wiped completely dry after cleaning. OZONE PASSIVE SAMPLER PROTOCOL, REVISION 2, 2/7/94 910. Repeat the process for each sampling badge. 11. Store the extract vials for each sampler in a cool place (but not refrigerated), in the dark, until the time of filter extraction (see below). V. Laboratory Analysis of Passive Ozone Samples A. Equipment To prepare the filters for analysis by ion chromatography (IC) using a Dionex 2000i or equivalent, the following equipment and supplies are needed: Calibrated automatic dispensing pipette (5 ml) Forceps, not serrated, sharp with curved tip IC vials (0.5 ml for Dionex auto-sampler) Caps for IC vials Syringes, 3 ml disposable Millex-LCR13 syringe filters Support rack for extract vials B. FILTER PREPARATION 1. IC vial preparation. Vials must be thoroughly washed with Milli-Q water, completely dried in room air while covered with Kimwipes, and stored in clean covered containers. (Vial caps provided by Dionex Corp. are used without cleaning.) 2. Filter extraction. The following steps outline the extraction process. Since filters are more stable when stored dry in the extract vials, best results are obtained when filters are extracted just before they are to be analyzed by IC. a. Pipette 5 ml of Milli-Q water into each extract vial using the calibrated automatic pipet.. After the water has been added, the vials are capped.. b. Procedure for extraction: 1). Check that the filters in each extract vial are completely immersed in the aqueous solution by removing the cap and visually inspecting the inside of the vial. If the filters are not completely immersed, then use clean not-serrated sharp pointed forceps, wiped with OZONE PASSIVE SAMPLER PROTOCOL, REVISION 2, 2/7/94 10Kimwipe moistened with Milli-Q water, to depress the filters into the aqueous solution. Be sure to wipe the forceps clean between samples. 2). Place the extract vials on a rack (see Figure 2.) in the ultrasonic bath. Adjust the level of water in the bath to be high enough to immerse the bottom of each vial (about 2 cm), but not so high that the vials float above the rack. 3). Sonicate the extract vials for 5 minutes, rotate the rack 90 degrees clockwise; repeat the rotation twice for a total sonication time of 15 minutes. 3. Preparation of syringes a. Preparation of 40 mN H.,5011) pour a very small amount of concentrated H2504 into a small beaker. 2. use a clean, dry Pasteur pipet to transfer 1.1 ml of the concentrated H2504 into a 5 ml graduated cylinder. 3) pour the concentrated H2S04 into a 1000 ml mixing cylinder, rinse the remaining reagent from the 5 ml cylinder with MQ water into the mixing cylinder, fill to the 1000 ml line with Milli-Q water, mix. 4) store in plastic bottle at room temperature. b. Cleaning of syringe 1) syringes must be cleaned just prior to use 2) clean a maximum of 5 syringes at a time (this assumes that no more than 88 samples will be extracted and tested for a given run, with 20 samples per syringe/Millex-LCR13 filter). 3) separate syringe barrels from plungers, place the parts in a 500 ml beaker, and cover the parts with 40 mN H2S04. 4) place the beaker in a sonic bath with water in the bath. sonicate for 5 mm, rotate beaker 90 degrees, sonicate 5 mm, rotate again, sonicate again (total 15 mm sonication). 5) pour out the 40 mN H2504 from the beaker to waste (do not reuse the H2S04 solution). Rinse the syringes three times with Milli-Q water. 6) reassemble the clean syringes, wipe off water with Kimwipes. 4. Pre 4. Preparation of Millex-LCR13 syringe filters a. prepare one Millex filter for each syringe. b. for each, using a cleaned syringe withdraw 2 ml of fresh 40 mN H2504 into the syringe. c. attach a new Millex-LCR13 syringe filter. d. holding the syringe filter firmly to the syringe, expel the 40 mN 112504 into a waste container. e. remove the syringe filter and withdraw 3 ml of Milli-Q water into the syringe. f. re-attach the filter and expel the Milli-Q water into a waste container. g. repeat e-f. OZONE PASSIVE SAMPLER PROTOCOL, REVISION 2, 2/7/94 11 h. note that about one drop of Milli-Q water remains in the filter. 5. Filtration of sample extracts a. vials with extract for all samples and blanks must be sonicated before filtration. b. separate all the extract vials (blanks and samples) into groups of 20 vials each. one syringe/Millex filter combination will be used for each group of 20. c. separate the syringe from the Millex filter, expel any remaining Milli-Q water from the syringe. d. withdraw 1 ml of sample extract from the extraction vial into the syringe. e. attach the syringe to the Millex filter. f. holding the filter firmly onto the syringe, expel exactly 5 drops into a waste container. g. inject 0.5 ml of the sample into an i.c. vial. h. if this sample requires duplicate analysis: withdraw 1.5 ml into the syringe (in step 4.), expel S drops to waste, and then inject 0.5 ml of sample into each of two i.c. vials. i. discard the remaining sample to waste. 6. Cleaning of syringe plus Millex filter between samples a. separate the syringe from the filter. b. withdraw 3 ml of Milli-Q water into the syringe. c. reattach syringe to filter and while firmly holding filter onto syringe, expel Milli-Q to waste. d. repeat steps 1-3. 7. Replacement of syringe plus Millex filter a. after using a syringe/Millex filter combination for twenty (20) samples, discard both. b. if there are less than 20 samples in the last group, discard the syringe/filter after the last sample. D. ION CHROMATOGRAPHY ANALYSIS These are the recommended conditions and components for IC analysis using the Dionex IC system. The exact conditions used can be modified as necessary. OZONE PASSIVE SAMPLER PROTOCOL, REVISION 2, 2/7/94 12Instrument: Dionex Model 2000i with conductivity detector: anion eluant flow 1.7 mL/minute; regenerant pressure 10 psi; nitrogen 99.9% pure @ 100 psi; eluant pressure 5 psi; detector range 10 µS. Columns: Separator column #AS4A (Cat 1137041); guard column IIAG4A (Cat # 37042); anion micromembrane suppressor Model #AMMS- 1. Eluant/Regenerants: (prepared with reagent grade chemicals) Eluant for ozone extracts: Regenerant: 1.08 mMNa2CO3, 1.02 mMNaHCO3 0.040 NH2504 30 ml 0.36M Na2CO3 30m1 0.34MNaHCO3 9940 ml Milli-Q-water total volume 10 L 11.1mL of 36 N H2SO4 Milli-Q water total volume 10 L Eluant stock solutions: 0.34 M NaHCO3 28.6 +/- 0.1 g NaHCO3Milli-Q water total volume 1 L 0.36 M Na2CO3 38.16 gNa2CO3 Milli-Q water total volume 1 L Nitrite, nitrate, and sulfate ion are measured using the ion chromatography configuration outlined above. In ozone filter analysis, nitrite is a very large peak since it is a main component of the coating solution. To measure the nitrate peak quantitatively, it is necessary to adequately separate the nitrite and nitrate peaks. The concentration of the anion eluant may be varied (diluted) to get optimum results. After repeated use, the columns ability to separate the peaks deteriorates, and more dilute eluant is required. Eventually the columns have to be replaced. OZONE PASSIVE SAMPLER PROTOCOL, REVISION 2, 2/7/94 13 IC Standards. Standards can be prepared for analysis of different anions for different types of samplers, which contain nitrite, nitrate, and sulfate ions. The solution concentration, ppm, is µ.g/mL. For analysis of ozone samples only, these standards can be prepared with only nitrate ion. Standard Sulfate Nitrate Nitrite A 10 ppm 8 ppm 8 ppm B 4 3.2 3.2 C 2 1.6 1.6 D 0.8 0.64 0.64 E 0.4 0.32 0.32 APPENDIX A C1eaning the Sampler Components Initial cleaning: Disassemble the sampler into its main components: a) separate the cylinder body with end-caps from the pin-clip; b) separate the end-caps and stainless steel screens from the body. Each of the individual parts must be thoroughly rinsed in separate groups with Milli-Q. Lay out the parts to dry on Kimwipes and cover them with Kimwipes to keep out dust. Routine cleaning: 1. Disassemble the samplers and set aside the cylinder bodies (with spacer disks and rings still inside) to be cleaned separately. 2. Rinse the end-caps with Milli-Q water, then set the parts on Kimwipes to dry. It may be necessary to tap the water out of the holes in the end-caps in order for them to dry completely. 3. Wipe the cylindrical bodies clean with Kimwipes moistened with Milli-Q water. Then use a dry Kimwipe to wipe off excess water. 4. Place the stainless screens in a beaker, then rinse them several times with Milli-Q water. Fill the beaker again with Milli-Q and place it in a sonication bath. Sonicate the screens for 5 minutes, then rotate the beaker a quarter turn; this procedure must be continued for a total of 15 minutes. Be careful not to damage or lose the wire mesh screens during handling. 5. All parts of the ozone passive sampler must be clean and completely dry before assembling the sampler. After cleaning, lay the parts on Kimwipes to dry. While drying, cover with one large Kimwipe to prevent dust/dirt from settling on the clean parts. 6. Inspect the pin-clips for obvious dust, dirt, etc. If necessary, rinse with Milli-Q water and lay on Kimwipes to dry. OZONE PASSIVE SAMPLER PROTOCOL, REVISION 3, Jan, 2001 14Example Calculation of Ambient Ozone Concentration Using Ogawa Passive Sampling Device (PSD) PSD Sampling Time = 24 hours Sample Extraction Volume = 5ml de-ionized water Ion Chromatographic analysis of extract = 0.7104 µg/ml nitrate Total nitrate = 0.7104 µg/ml x 5ml = 3.552 µg PSD Sampling rate for Ozone is 21.8 mls/min O3 ppmV= 3.552µg NO3 x 1µmol O3 x 1µmol O3 x 24.45 µL O3 x 10-6M3O3 21.8ml O3 / min x 1440 min 62µg NO3 1µmol NO3 1µmol O3 1000µL O3 x 106 µL x 106mL O3 L M3 O3 =0.045 µL/L or 0.045 ppm =0.045 X 1000 = 45 ppb To separate the constant: = 3.552µgNO3 x ? 1 x 1 µmol NO3 x 1 µmol O3 x 24.45 µLO3 x 10-6M3O3 x 106mLO3 x 106µL ? 1440 min ? 21.8mLO3 / min 62µg NO3 1µmolNO3 1µmol O3 1000µL O3 M3O3 L ? = 3.552 x (18.09 µL/L? 1440 ? ? = 0.045 µL/L or 0.045 ppm or 45 ppb Outside Laboratory Analysis Should the exposed samplers, safely sealed in the brown vials ,be sent to an outside laboratory for analysis, it is of primary importance that they be clearly identified so that the results can be correctly attributed to a specific sampler and location. The exact length of exposure duration for each sampler, in minutes, must be communicated in writing to the laboratory. Additional data such as average humidity and temperature during the time of exposure will permit more accurate concentration data. OZONE PASSIVE SAMPLER PROTOCOL, REVISION 3, Jan, 2001 15 V. Laboratory Analysis of Passive Ozone Samples PSD Sampling Time = 24 hours O3 ppmV= 3.552(g NO3 x 1(mol O3 x 1(mol O3 x 24.45 (L O3 x 10-6M3O3 Outside Laboratory Analysis
Most popular related searches