

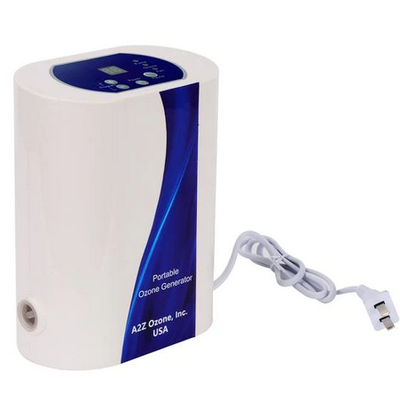
A2Z - Model Aqua-8 -Ozone Generator
The Aqua-8 ozone machine has an upgrade in ozone output of up to 800 mg/hour with an oxygen supply. You get about 160 mg/hour without oxygen, which is plenty for most at-home applications.
NOTE: The Aqua-Series Ozone Generators are not suitable for a cold plunge tub, a freezer converted into one, or an ice bath. The Aqua-Series Ozone Generators are not made to withstand the pressure of more than 4 to 6 inches into the water. Please look into the MP-3000 Ozone Generator for a more appropriate match. A New Personal Ozone Generator Arrives
For many of you, the added oxygen port gives this personal ozone generator a higher purpose. Add an oxygen tank with at least a 5 PSI regulator from your oxygen supply store and get the benefits.
Precise Features
Consider the benefits of these great features when buying a new ozone generator. Get more ozone, precise settings, onboard diagnostics, and a sleek, upright design.
Power Loss No Longer a Problem
Yacht owners, aquarists, and those who use the repeat settings love this generator. Whenever there is a power loss, the Aqua-8`s internal memory will allow it to start right back up where it left off. No surprises when the machine stops.
Special Features
- 18-setting functional timer
- Internal memory with the previous setting
- Lightweight and portable
- Wall-mountable
- One-year full parts and service warranty*
Parts Included
The Aqua-8 Ozone Generator comes with everything you need--stones, tubing, manual.
- Aqua-8 ozone generator
- Aqua-8 operation manual
- Two 36" flexible tubes for ozonating
- Two 1" oblong, grey diffuser stones
- Spare fuse
- Plug the Aqua-8 ozonizer into an electrical outlet.
- Attach one end of the tubing (36 inches long) into the ozone outlet on the side of the Aqua-8 Ozone Generator and attach a stone diffuser onto the other end of the tube.
- Extend the tubing so that the diffuser stone and the Aqua-8 Ozone Generator are as far apart as possible.
- Push in the power button located on top of the unit to the ON position.
- Press the plus (+) button to select the desired function setting from the table for the desired application time.
- The minus (-) button will step down the setting numbers sequentially.