

- Home
- Companies
- Qubino by GOAP
- Products
- Qubino - Mini Dimmer
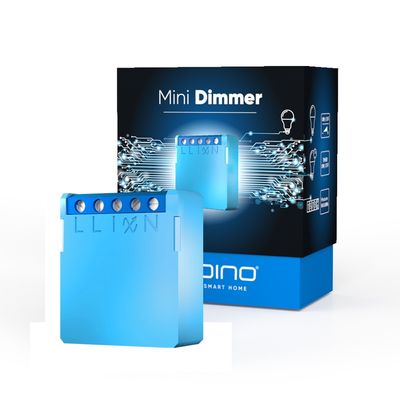
Qubino - Mini Dimmer
Smarten up your conventional lighting, control and dim your lights from anywhere. Qubino Mini Dimmer enables you to remotely control and dim all types of dimmable bulbs. Whether you’re unwinding on the couch, busy at work, or vacationing miles away, you’ll be able to remotely control and dim your home lighting from anywhere.
Qubino Mini Dimmer will calibrate to work with your specific type of bulb – from LEDs, CFL, halogen to incandescent bulbs. No matter what type of bulb you’re using, Mini Dimmer will bring a maximum amount of dimming range.
Would you like to impress your guests by creating a perfect atmosphere for the occasion?
Whether you want to create a flattering glow for a romantic meal or a party inspiring lighting, with Mini Dimmer you`ll be able to play with lights and spark the right mood. Gathering in your home will never be dull.
During dinner, you enjoy different lighting than when reading a book or working at a computer. Now you can create different ambience throughout your home. Switch to a bright light to allow you reading a book while the rest of the room can be dimmed to let others enjoy watching their favorite movie without stopping you from reading.
anytime anywhere.
Control the safety of your home with a single tap.
Prevent burglars from breaking into your home. Simulate your presence at home, by turning your lights on and off when you’re out. Make your house a safe home giving an impression to potential burglars that you are home while on vacation, for example.

The 2-wire installation system is very common in the electrical wiring of older homes. Thanks to Qubino Mini Dimmer these can be turned into smart homes as efficiently as new houses. Mini Dimmer does not require a neutral wire (N). It works also in a 2-wire installation, which does not have a neutral line.
Works in a 3-wire installationThe Qubino Mini Dimmer has been designed as the universal light dimmer that will work with any type of electrical wiring - a 2-wire or a 3-wire installation system. No matter if your electrical system has a neutral or not, Mini Dimmer will connect perfectly.
No minimum load requiredYour existing low wattage bulbs can be converted to smart lights with one switch. For example, if you have a 3W bulbs you will be able to dim lights easily with the Qubino Mini Dimmer, at the contrary of other similar devices available on the market.
With Mini Dimmer, you can connect and remotely control low wattage bulbs. There is no minimum load power required
With Qubino Mini Dimmer your electrical installation is 100% safe because it has an integrated protection fuse. This means, it complies with safety standards, is safe-to-use and you do not have to buy an additional fuse to protect the electrical installation.
In order to be safe and eligible for selling on the market, all dimmers and similar devices must pass overcurrent tests, set by the international standard EN 60669-2-1.
One of the ways to pass and become a certified, “safe-to-use” device is, to have a built-in or external protection fuse, to protect the dimmer and the light connected to the dimmer from damage.
If your dimmer does not have a built-in fuse, make sure you buy an appropriate external fuse. Only by doing this, your electrical installation will be 100% safe.
Why Mini Dimmer guarantees you the easiest and quickest installation?
Mini Dimmer fits in any flush mounting box worldwide. Because it’s the smallest dimmer worldwide. It fits in even the smallest, most shallow and most crowded electrical boxes, overflowing with wires.
No matter how small, shallow, crowded or stuffed with electrical cables, Mini Dimmer will fit smoothly in any flush mounting box. Reduce assembly time and installation expenses, install it fast and easy behind a classic switch.
to make your set-up easier
Mini Dimmer has an RGB LED signalization. With RGB LED light easily recognize, if the Mini Dimmer is included or excluded from the network, be aware in case of overload or overheating and when the calibration is in progress.
Qubino Mini Dimmer consumes the least electricity in the dimmer community, only 0,4W.
Qubino packaging is made of 0% plastics, we only use carton material that can be recycled.
- Power supply: 110 - 240 VAC ±10% 50 / 60 Hz,* (24–30 VDC)
- Rated load current of AC output: 0,85 A / 240 VAC
- Output circuit power of AC/DC output (resistive load): 200W (240VAC) / 90W (110VAC)
- Power measurement accuracy (2-Wire): ±10%
- Power measurement accuracy (3-Wire): ±2%
- Operation temperature: -10 ~ +40°C (14 ~ 104°F)
- Z-Wave operation range: up to 30 m indoors (98 ft)
- Dimensions (WxHxD) (package): 38x33,5x15,5mm (74x43x86mm)
- Weight (with package): 24g (50g)
- Electricity consumption: 0,4W
- Mounting: Ø ≥ 60 mm (2,36 in) or 2M, depth≥ 60 mm (2,36 in)
- Switching: MOSFET (Trailing edge)
- Z-Wave Repeater: Yes
ORDERING CODE (MODEL NUMBER): Z-WAVE FREQUENCY
ZMNHHD1: 868.4 MHz
ZMNHHD2: 921.4 MHz
ZMNHHD3: 908.4 MHz
ZMNHHD4: 869,0 MHz
ZMNHHD5: 916,0 MHz
ZMNHHD6: 868,4 MHz
ZMNHHD7: 919,8 MHz
ZMNHHD8: 865,2 MHz
ZMNHHD9: 922,5 MHz
ZMNHHDA: 919,7 – 921,7 – 923,7 MHz
ZMNHHDB: 868,1 MHz
ZMNHHDC: 868,4 MHz
ZMNHHDD: 919,8 MHz
ZMNHHDE: 920,9 MHz
Parameter no. 1 –In-wall Switch Type for Load 1 (Q?)to control I1
With this parameter, you can select between push-button (momentary) and on/off toggle switch types.
Values (size is 1 byte dec):
- default value 0
- 0 - push-button (momentary)
- 1 - on/off toggle switch
Parameter no. 5 – Working mode
With this parameter, you can change the device presentation on the user interface.
Values (size is 1 byte dec):
- default value 0
- 0 - Dimmer mode
- 1 - Switch mode (works only in 3 way wiring-connection with neutral line)
NOTE: After parameter change, first exclude the device (without setting parameters to default value) then wait at least 30s before reinclusion.
Parameter no. 11 - Turn Load 1 (Q?) Off Automatically with Timer
If Load (Q?) is ON, you can schedule it to turn OFF automatically after a period of time defined in this parameter. The timer is reset to zero each time the device receives an ON or OFF command, either remotely (from the gateway (hub) or associated device)) or locally from the switch.
Values (size is 2 byte dec):
- default value 0
- 0 - Auto OFF Disabled
- 1 - 32536 = 1 - 32536 seconds - Auto OFF timer enabled for a given amount of seconds
Parameter no. 12 - Turn Load 1 (Q?) On Automatically with Timer
If Load (Q?) is OFF, you can schedule it to turn ON automatically after a period of time defined in this parameter. The timer is reset to zero each time the device receives an OFF or ON command, either remotely (from the gateway (hub) or associated device) or locally from the switch.
Values (size is 2 byte dec):
- default value 0
- 0 - Auto ON Disabled
- 1 - 32536 = 1 - 32536 seconds - Auto ON timer enabled for a given amount of seconds
Parameter no. 21 - Enable/Disable the Double click function
If the Double click function is enabled, a fast double click on the push-button will set the dimming level to the maximum dimming value.
Values (size is 1 byte dec):
- Default value 0
- 0 – double click disabled
- 1 – double click enabled
Parameter no. 30 - Restore on/off status for (Q?) load after power failure
This parameter determines if on/off status is saved and restored for the load Q? after power failure.
Values (size is 1 byte dec)
- default value 0
- 0 - Device saves last on/off status and restores it after a power failure.
- 1 - Device does not save on/off status and does not restore itafter a power failure, it remains off.
Parameter no. 40 – Watt Power Consumption Reporting Threshold for Q? Load
Choose by how much the power consumption needs to increase or decrease to be reported. Values correspond to percentages so if 10 is set (by default), the device will report any power consumption changes of 10% or more compared to the last reading.
Values (size is 1 byte dec):
- default value 10
- 0 - Power consumption reporting disabled
- 1 - 100 = 1% - 100% Power consumption reporting enabled. New value is reported only when Wattage in real time changes by more than the percentage value set in this parameter compared to the previous Wattage reading, starting at 1% (the lowest value possible).
NOTE: The power consumption needs to increase or decrease by at least 2 Watts to be reported, regardless of percentage set in this parameter.
Parameter no. 42 – Watt Power Consumption Reporting Time Threshold for (Q?) Load
Set value refers to the time interval with which power consumption in Watts is reported (0 – 32767 seconds). If 300 is entered, energy consumption reports will be sent to the gateway (hub) every 300 seconds (or 5 minutes) if there was a change compared from the last report.
Values (size is 2 byte dec):
- default value 0
- 0 - Power consumption reporting on time interval disabled
- 30 - 32767= 30 - 32767seconds. Power consumption reporting enabled. Report is sent according to time interval (value) set here.
NOTE: Values from 1 to 29 are ignored by device due to standard recommendation.
NOTE: The report will be send only if there was a change compared to the last report.
Parameter no. 60 – Minimum dimming value
The value set in this parameter determines the minimum dimming value (the lowest value which can be set on the device, when, for example, dimming lights with wall switch or slider in the GUI (Gateway - hub)) (Data type 1 byte dec)
Values (size is 1 byte dec):
- default value 0 = 0% (minimum dimming value)
- 1-98 = 1% -98%, step is 1%. Minimum dimming value is set by entering avalue
NOTE: The minimum level may not be higher than the maximum level! 1% min. dimming value is defined by the Z-Wave multilevel device class.
Parameter no. 61 – Maximum dimming value
The value set in this parameter determines the maximum dimming value (the highest value which can be set on the device, when, for example, dimming lights with wall switch or slider in the GUI (Gateway - hub))
Values (size is 1 byte dec):
- default value 99 = 99% (Maximum dimming value)
- 2- 99 = 2% - 99%, step is 1%. Maximum dimming value is set by entering a value
NOTE: The maximum level may not be lower than the minimum level! 99% max. dimming value is defined by the Z-Wave multilevel device class.
Parameter no. 65 – Dimming time when key pressed (soft on/off)
Choose the time during which the device will move between the min. and max. dimming values by a short press of the push-button I1.
Values (size is 1 byte dec):
- default value 1 = 1s
- 1 - 127 = 1 seconds- 127 seconds, step is 1 second
Parameter no. 66 – Dimming time when key pressed
Choose the time during which the Dimmer will move between the min. and max. dimming values during a continuous press of the push-button I1, by an associated device or through the UI controls (BasicSet, SwitchMultilevelSet).
Values (size is 2 byte dec):
- default value 3 = 3 s
- 1-127 = 1 second – 127 seconds
- 128 – 253 = 1 minute – 126 minutes
Parameter no. 67 – Ignore start level
Choose whether the device should use (or disregard) the start dimming level value. If the device is configured to use the start level, it should start the dimming process from the currently set dimming level. This parameter is used with association group 3.
Values (size is 1 byte dec):
- default value 0
- 0 – use the start level value
- 1 - ignore the start level value
NOTE: Parameter is valid only in Dimmer mode. In Switch mode the parameter has no effect.
Parameter no. 68 – Dimming duration
Choose the time during which the device will transition from the current value to the new target value. This parameter applies to the association group 3.
Values(size is 1 byte dec):
- default value 0 (dimming duration according to parameter 66)
- 1 - 127 (from 1 to 127 seconds)
NOTE: Parameter is valid only in Dimmer mode. In Switch mode the parameter has no effect.
Parameter no. 70 - Overload safety switch
The function allows for turning off the controlled device in case of exceeding the defined power for more than 5s. Controlled device can be turned back on by input I1 or sending a control frame.
Values (size is 2 byte dec):
- default value 200
- 1 – 200 = 1 W – 200W
- 0 = function not active
NOTE: This functionality is not an overload safety protection, please check the technical specifications chapter for more details.
In case of overload the following message will be send towards the controller:
- COMMAND_CLASS_NOTIFICATION_V5
- The Alarm V1 type field set to 0x00
- Notification Type 0x08 and 0x08 (Overload detected)
Parameter no. 71 – Calibration trigger
Choose when will be the calibration procedure triggered.
Values (size is 1 byte dec):
- default value 0 - calibration done after power cycle if module is excluded
- 1 – calibration done after power cycle regardless of inclusion status
- 2 – force calibration. Calibration will start immediately
Parameter no. 72 – Calibration status (read only)
Whit this parameter you can check the calibration status.
Values (size is 1 byte dec):
- default value 2 – calibration failed
- 1 – calibration was successful
- 2 – calibration failed
Parameter no. 73 – Alarm/Notification events
This parameter defines the module behaviour in case it receives any Alarm/Notification events.
Values (size is 1 byte dec):
- default value 0 – function not active
- 1 – turn ON
- 2 – turn OFF
- 3 – start blinking (output turns 1s ON, and 1s OFF)
NOTE: When value 3 is selected the default time interval of the blinking is 10 minutes. It can be stopped with a button press or sending a control frame. To adjust the time interval please refer to parameter 74 – Alarm/Notification time interval.
Parameter no. 74 – Alarm/Notification time interval (dependant on parameter 73)
This parameter defines the time interval of the blinking state, once the module receives an alarm/notification event. Minimum step increase is 1 minute.
Values (size is 1 byte dec):
- default value 10 = 10 minutes
- 1– 125 = 1 -125 minutes
NOTE: This parameter does not have any effect if parameter 73 is not set to value 3.