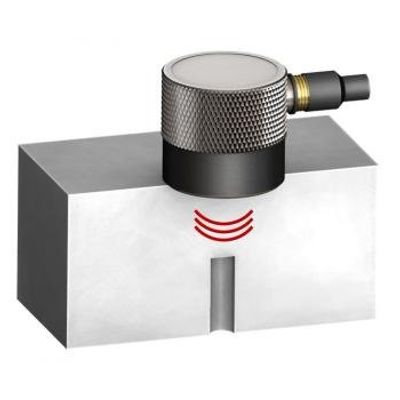


Flat-Bottom Holes (FBH)
The machining of flat bottom holes constitutes a large part of what we are known for at PH Tool™. These holes appear in many test blocks such as ASTM reference blocks made to E127 and E428, and many other block types as well. In addition, countless application-specific standards employ the use of flat bottom holes at various depths and diameters. They simply make for excellent ultrasonic inspection targets with very predictable and quantifiable dimensions. We take many steps at PH Tool to ensure that you get a drilled flat bottom hole of the highest quality available. We employ both conventional machining (drilling) and nonconventional (EDM) machining in the hole-making process. The determining factors we consider in choosing a method are machinability of the workpiece, accessibility, hole diameter and depth. Most FBHs are drilled in the range of 0.250” (6.25mm) diameter and under.
Many specifications call for them to be drilled in increments of 1/64 inch. PH Tool regularly drills holes in the range of 1/64 inch thru 8/64 inch for most applications. Our modern CNC milling centers allow us to conventionally drill FBHs in workpieces down to 0.008” (0.2mm) in diameter.
Smaller holes are machinable via EDM. With recent investments in CNC-controlled fine-hole EDM machines, our capability for drilling extremely small FBHs has dramatically increased. With EDM technology, we have successfully machined FBHs down to 0.004” (0.10mm) in diameter. We are constantly pushing the envelope on what we thought was possible by machining FBHs in tough materials like high-nickel superalloys, tool steels, titanium, and more. We blow right past the drill manufacturers’ recommendations when it comes to drill diameter/depth aspect ratios.
The image shown below displays a special EDM electrode that has been dressed down from a .040" diameter shank to an ultra-small .003" diameter "business end" at the bottom. A human hair is shown in the image for comparison. Electrodes are dressed right on the same machine that is used to make the holes to ensure excellent concentricity. The electrode is rotated during machining of these holes to ensure even electrode wear, resulting in a perfectly round hole that is right on-size. Multiple dresses of the electrode also virtually eliminate the corner radius at the bottom of the hole, making a reflector that is as sharp and flat as physically possible.
PH Tool employs a trustworthy process to machine and mechanically measure FBHs. It is good practice to start with a spotting tool or countersink. This provides a shallow, conical starting hole for the initial drill to center itself and not deflect or skid off center. This is especially important when entering an irregular or angled surface. Next, the spotting tool is removed, and the holes are peck-drilled to within a few thousandths of an inch of the final depth, using a standard, pointed drill bit. A skilled toolmaker then grinds the bit to 180° (flat) under high magnification in-house on a Swiss-made precision drill grinding machine. The drill is inspected on a calibrated, NIST-traceable video measurement system to ensure flatness before and after drilling the last few thousandths of the hole. We use gauge pins to determine the finished diameter of the hole, and then use a calibrated depth gauge with a pointed pin to determine the depth. The depth we measured using the pointed pin is then compared against that of a flat pin, to ensure there is no concavity at the hole bottom. In addition to the mechanical inspection using gauge pins, the hole bottom is optically inspected using specialized scopes or vision inspection systems. A final look at the flat bottom drill reveals that the drill is still sharp, and has no corner radius, which would reduce the reflective area of the drilled flat bottom hole. This same, comprehensive process applies to even the smallest flat bottom holes we machine here at PH Tool.
